Welcome

Welcome All! I'm a dreamer, I hope you are too! A Posse ad Esse, or From possibility to reality, is a general state of mind. I hope you'll share your possibilities with me as I will with you. Namaste~
Showing posts with label harvest. Show all posts

February 21, 2011

Using the harvest

As we approach the new season, I thought I'd mention an important part of what goes into planning our garden, how we will use our harvest through the year.

This Monday we decided to make some paninni sandwiches for lunch and one of our favorite additions to our sandwiches are sun dried Roma tomatoes.

Here we have a bag of dried tomatoes from August of last year, that I'm going to make a batch of re-hydrated tomatoes with.

The first thing that I do when I re-hydrate tomatoes is to place a portion larger than what I actually want to eat (if you're going to make them, you may as well make enough to enjoy for a while.) and place them in a bowl.
To this I add some luke warm water, but just less than it would take to soak them all because I like to add a bit of balsamic vinegar to add some extra flavor to them too.

After an hour our so, the tomatoes will be tender and you can either eat them then or store them for later. To store the tomatoes for later, we place them in one or two small canning jars and add some olive oil to just cover them. This will store easily in the fridge for at least a week.

Now... to revisit our homemade ravioli recipe... sun-dried tomato and ricotta??? What's your favorite way to enjoy sun-dried tomatoes?
P~

September 27, 2009

On the garden front


All is well.
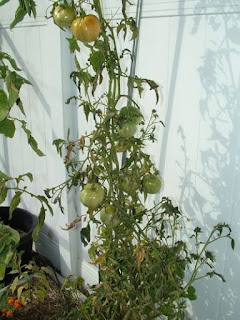
Some things are starting to show some signs of slowing, while others are really just kicking in. Some of the tomatoes for instance, while still giving prodigious harvests, ( I'll go into that later ) are starting to show signs of stress. The long hot summers do take their toll on things by this time of the year. But hey, They take their toll on me too so I can't blame them.

on the other hand, our green pole beans are really just coming on strong now. I thought that we wouldn't get a good harvest of them this year, and it still won't be as good as last years, but after consulting that garden journal from last year (can I tell you what a blessing that thing has been!) we found that our first substantial harvest of green beans last year wasn't until mid September either. We figure we're about 2 weeks behind. That will catch up to us on the back end, but honestly I couldn't have handled more if they'd have come any earlier!

A couple of other things that have been fun this year have been our green peppers and eggplants.
I don't know if it was a product of the long cool spring that we had giving them a chance to root well, or if the new Lasagna garden that I planted them in just acted like rocket fuel to them, but we got a better crop of both of them this year than we've ever gotten. And of course this years new crop for us was Okra. I followed the instructions of a woman that I met in our Master Gardener program that had learned to grow them in the south and they've done great! To think that last year I never even managed to get them to germinate and this year I'm harvesting bunches at a time. It's all about planing the seed direct well after any chance of cool weather. They like it hot.
I mentioned that we pulled our Mid season potatoes a while back. I never did manage to get a photo of that harvest up though. It was a good one so I thought I'd share.

We got a few tomatoes, cukes, a watermelon and such then too. We've eaten a lot of potatoes, but they're mostly a fall/winter thing for us so many of these are in the cold storage waiting for Thanksgiving.

I guess while I'm on the topic of harvests I can meander off in that direction with you. We've done well this year. We set a goal of 1500 pounds during the winter while we were working up our garden plan for this year. It was ambitious to say the least, but we figured what could it hurt to shoot for the moon. Well, we lost our entire pumpkin crop as well as a few zucchini plants and our watermelons to squash bugs this year. They were TERRIBLE. That's set us back quite a bit I think but as of tonight we have a running total of 745.25 pounds (Not counting eggs of course.) so I think we're doing pretty darn good. We'll hit 1000 lbs this year I'm sure or at least come pretty darn close. Last year for the entire year we got a total of 521 pounds so if nothing else we can be glad to have well beaten our own best.

We also set a one day harvest record for ourselves a couple of weeks ago. Remember
I said I'd get back to the prodigious tomatoes? Well, thanks in no small part to a one day harvest of 140 pounds, we brought in just over 166 pounds in one day. Curious what 140 pounds of tomatoes looks like?

For perspective, they're covering the top of our full-sized chest freezer. Suffice it to say we had a lot of tomatoes!

So then what's a family to do with all this stuff? Well, besides eat it of course. We gave a good bit of it away to friends and like the old saying we're so fond of...

"Eat what you can and CAN what you can't" we put up a bunch of jars this year. more to come on that.

P~

May 20, 2009

The Garden Walk

Growing a garden takes commitment and a good bit of time. It's not a something for nothing proposition. Aside from the bursts of very hard work that come with planting and planning there's the maintenance. Weeding, watering and watching for that just right time to harvest.

It's that part, the maintenance part, where A~ and I have come up with a very pleasant way to keep up with it; our garden walks. Every night, nearly anyway, after I've come home from work and we've eaten dinner together she and I take the garden walk. And yes, we actually ask each other "You ready to take a garden walk?". So, after the last couple of weeks of hard work in the garden, planting, double digging, moving, rearranging and such, I thought I'd ask YOU.."You ready to take a garden walk with me?"First out the back door we notice that the sunflowers that A~ started from seed and has planted all over the garden for the bees to enjoy are coming along great.Next up is one of my test plants from last year. They're beets that are going to seed. What a gnarly looking plant!Here on the East facing part of the house where I only really get morning sun I've found that there's a great micro climate for growing my lettuce. Here's some Iceberg and Romaine.This is one of our new garden beds that we added to the South side of the house. I'm trying out the Three sisters here. Beans, squash and corn.You can see the sisters better in this pic.
Now then...sliding over to the south fence line we check out another new bed for this year, the Lasagna bed that I added in the Fall. Along it, I've planted some watermelons, peppers, Casaba melon, Eggplant, bush cucumbers and 12 Hamson determinate tomatoes of different sizes. I tried to make it a good mix of different types in order to get a good idea of how things do in this part of the yard.Going around the corner from the south side of the yard to the East one, I have eight Roma VF determinate tomatoes (not pictured) and then yet another patch of tomatoes. These are some Celebrity and Heartland tomatoes. Brussels sprouts and Swiss Chard here... First time for Brussels this year. They're looking healthy though.
Here in the slightly shadier area behind the pergola our raspberry and rhubarb patch has gone crazy this year. Oh yeah! Pies and jellies here we come... Don't believe me?
Well just beyond them is the strawberry patch. These three together, the raspberries, strawberries and rhubarb that is, make up what we call the "pie garden". Last year this little 3x10 patch yielded 25 lbs. Looks like this may be another great year.
I skipped a couple of beds obviously, well obvious to me anyway, but it was not on purpose. They both held Kohlrabi and some cabbage plants. Either way, I've move over to the north garden now, and here's the crop of the year, my peas. This is one of the beds that I planted approx 300 seeds in. So far they're all growing great.
I had the question of how they would be supported. I've decided to try two different ways. The first picture has literally no supports. They are completely self supported. This bunch have clung to a horizontal layer of strings that I tied around the trellis structure. Both are working fine so far. In fact...
They're starting to bloom!! But I need to continue or we'll never get done.
The next bed on the walk brings us to our cabbage and Broccoli plantings. It's got Napa Cabbage that I'm getting ready to harvest, and broccoli that is coming along great.
Check it out, Heads! We're so excited to try these out soon.
This was the bed that we grew our squash in last year. It's an odd sized one from the others, so we've decided to grow a mix of stuff in it. The left side are Sugar Snap peas and the other fern looking things are our multiple plantings of carrots for the summer.
Finally, one last bed of cold weather crops round out our original North side garden beds. This has more broccoli mixed with a bunch of Kale. I say original north side beds because we've had yet another expansion this year.
Ta-Da...The new north side Expansion. Four new 4x4 beds that will be holding indeterminate tomatoes, cucumbers, and beans this year. This was the previous location of my compost bins and all my junk that I collect for projects. I'll have to show you where those ended up on another post.
Now we're heading through the gate into the front yard. And this area is the very last bit of newly added garden space from this year. It's the potato and onion garden. These of course being the onions, and these...
being the potatoes! We just love watching these grow. I can't tell you why necessarily, but we both do. They're growing fantastically. Full, green and healthy. Just about ready for some mounding too. Stay tuned for more on that.
Well, that's about it for the food gardens. They're coming along well I think. I do want to finish off by closing out this idea of the garden walk. The point isn't just to walk around and admire, although that is admittedly a perk, but rather to check on things and make sure all is well. This routine of regularly checking on everything gives us the opportunity to pull a new weed here or there, and make sure we aren't starting to see a new pest infestation.
So get out and check on your gardens. Keep in tune with them and they'll reward you.
Till next time.
P~

October 25, 2008

"Big weigh-in" Spring/Summer wrap-up

Do you see that? Maybe you can't quite make it out...I'll help you out, It says Spring / Summer garden 511.68 lbs!!! WE DID IT! A~ and I set out this year to grow for 500 lbs and as of yesterday, we not only met, but exceeded that goal. With the days being pretty warm here, and the nights getting around freezing, even the plastic tarping wasn't helping the tomatoes to ripen as well as I'd hoped. (Although the cherry tomatoes are actually still producing.) That said, I decided that it was probably a good time to get out and harvest what was effectively the final harvest from the Spring and Summer garden.
A few of the tom's are still green and some not quite ripe, but all will be enjoyed in their own time. I honestly wasn't sure that we were actually going to be able to make the goal, this being the first year that we had ever aspired to even weigh all of our harvests. A~ on the other hand has seemingly turned into a pro harvest estimator; she said all along that we'd make it and what do you know, here we are.

The best part is, we're not even done completely yet. There's probably another couple of pounds on the cherry tomato, and I have fall planted spinach, beets and kohlrabi yet to harvest. Hopefully the weather will hold for a little longer to let them all bulk up a bit, but if not I have to say A~ and I are both pretty happy that we've been able to meet our goal.

So, what's next? A~'s already talking not doubling but tripling it next year. Um, does she realize that that's 1500 lbs??? Who am I to argue... I'm just the labor. I will say that the backyard expansion is already nearly done and should be by the end of the weekend. The next thing on the list is relocating the chickens for next year and then tilling up our "parking area" on the front side-yard of the house. You didn't think we'd just sit back and be satisfied did you?

Have a great weekend all.
P~

October 11, 2008

Fighting the freeze

First off, I'm sorry to billbillbillbill (Freedom Gardens member) for lagging on getting this post up. Life... it happens, you know?

Anyway, on we go. Those of us local to Utah have found, as have many of our fellow gardeners in the Northern Hemisphere, fall is upon us. And with that the first frost/freeze warnings of the year. We received our first one this week and from the looks of it, it should be a hard one. The forecast is even calling for the possibility of snow in the valley. Drastic steps must be taken!

As you can see, the majority of my garden was removed this week. It's always a hard part of the year for me, sort of a gardeners version of separation anxiety. The beans were done though, as were the cucumbers, but the carrots that were growing in the area under the cukes have been left to overwinter. The only things being kept in the summer garden to try and stretch the harvest of are the tomatoes.

The last few nights have really pushed the limits of what the tomato plants can handle. The night before last in particular. I thought that for any of you that may be new to vegetable gardening I would show you what the signs of too much cold are on your tomato plants.
See there on the left hand corner of that tomato, the almost translucent part of the fruit? That is frost bite. That part of the fruit has been damaged. It's not necessarily beyond hope, depending on the amount of frost bite that happened. Then in the picture on the right, you see the darkened and wilted tips of one of the new shoots coming up on the plant, it's been frost bitten as well. This won't kill the plant, but honestly that shoot will most likely die at this point. It's OK though, I'm gonna tell you what to do with it here in a minute anyway.
Here are a couple of the tomato plants that I have growing in my beds. The one on the top is my brandywine. It had a very slow summer, I learned that it was not very tolerant of our hot summers here, and now that I've finally set a good number of fruit on it by golly I'm not just giving up on it! The one on the bottom is my San Marzano. I'm keeping it going just for the sheer number of green tomatoes on it.

What I did to these to get them ready for my version of season extension, and which will resolve the frost bitten plant tip from the previous picture, is to prune them. I trimmed the heck out of all of these prior to covering them. This site illustrates tomato pruning very thoroughly so I'll just link to it and not reinvent the wheel. Essentially, the idea is to top the plants, and remove all new growth so as to allow the plant, which is already getting stressed from the cold, to focus on maturing the already set fruit and not to growing more foliage or new fruits.

After I pruned them, and cleaned up the ground around them, I covered them with a 4 mil. clear plastic cover, basically making a small A-frame greenhouse. Let me digress here for a second... I also placed a little garden addition in the beds a few days back that really helps moderate the micro-climates around the plants as well... black water bottles. All they are, are plastic 1 gallon water bottles that I filled with some tap water after painting them black. They will get warm throughout the day and then hold that heat and radiate it back out throughout the cold nights.

I place them right at the bottom of the plants in the path of the sun, and they will slowly radiate that heat back up all night. I took the thermometer picture yesterday afternoon at approx. 3:30 PM when the outside temps were around 50-51 deg F. The temp in the water container is almost 80 deg F. So...back to the A-frame.

Voila! There it is. I want to take a minute to make the statement that this is yet another great benefit of trellising in the home garden, I can't speak to their benefit enough. The trellis that I used this year to hold up the tomatoes is the top of this cover. It allows me to leave the cover over the plants and to be able to get inside to water or check the fruits without removing the whole cover. A very nice benefit.

Fall is beautiful, and it's an important time for both the garden and the gardener to slow down a little, catch their breath and get ready for the next year. If you're really motivated it is possible to harvest all year, although I'm not quite to that point myself yet, perhaps next year. There are a lot of really good ways available and I'm sure some products one could buy to do much the same, but either way if you're not quite ready to give up the battle against the freeze then put together a plan, give it your best shot and as always learn from the process.
Good luck all.
Stay tuned for some interesting and very cool news to come on the next post.
P~

October 6, 2008

I've got Leather Britches!

Yeah, and their green and kinda slowly getting wrinkly and...oh wait, you didn't think I meant like actual "leather britches" did you? No no no no no... that's just not something that anyone would want to see!

What I'm talking about is green bean leather britches. Strings of green snap beans that are dried to preserve them for later use. It's one of the oldest ways of preserving food, and one I'm excited to see how it works out. Here's what they look like in my cold storage downstairs.
When A~ was out in West Virginia she spent some time talking with her mom about the kind of things we are doing out here; growing, harvesting and preserving food for instance. As they talked, T~ (that's her mom...) reminded her of stringing leather britches when she was little. A~ said it was like a little door to her past opened up and she could totally remember it and couldn't believe she had never remembered it on her own. I was intrigued, having never heard of it, so of course with the glut of beans we've had this year I had to at least give it a try.

Here's a detail of how the beans have been strung up to dry. I started one with a darning needle and a strong but thin string (I used crochet string.) through a thick bean, tied the string around it and then proceeded to string the beans through the center onto the string.
It's a lot like stringing cranberries or popcorn for garland. After stringing about three feet of beans, I doubled the strings over and tied them together. These I hung over the old curtain rod downstairs to dry.

After I did a little research, I found out that this kind of preservation of beans is a very common and very traditional method of preserving the harvest in Appalachia. If you have a few minutes, this is a very interesting read about some of the ways leather britches are cooked and some of the history of the Appalachian cooking and methods. These are the kind of gems of knowledge that are out there in the world around us, but are hidden in plain sight for the most part. But, if we take the time to ask questions and share about the things that we're working on, and then actually listen to their answers, I think we'd be surprised how much useful and traditional information is out there for us.

I'm so thankful for the great Appalachian heritage that A~ brings to our home. We'll certainly think of it fondly while we're warmed by a hot bowl of vegetable soup with leather britches on a cold night this winter. Just one more way to preserve, extend and make the most of the harvest.

Till tomorrow.
P~

September 21, 2008

Growing for 500!!

I got out into the garden this evening, and was able to bring in what was actually more food than I realized I had ready. After bringing it all in and seeing how much there was I realized I hadn't put up a good harvest picture for some time so why not now! And if I don't say so myself, didn't I set this shot up nicely? It's approx 42 lbs of food.
In the picture I have apples, green beans, Marketmore and Boston pickling cucumbers, jalapenos, San Marzano tomatoes and some volunteer Romas, ichiban Japanese eggplant, bell peppers and Swiss chard. Oh and let me throw this little tidbit it...that's only half the beans I pulled today. In total I picked 22 1/2 lbs of beans today! Is that crazy or what? Good thing we all love beans right? Guess what I'll be doing next week? Yep, canning. Speaking of that, anyone have a good recipe for applesauce? We actually gave almost 10 pounds of beans away to some friends of ours that are looking into growing their own for next year but we still have plenty. It really is a blessing to be able to share with friends and family when we have a bounty isn't it?

A~ and I talked at the beginning of this season, when we decided to make a concerted effort at weighing all of our food we really had no data to go by in guessing what we'd get out of it. Initially we guess we may be able to make it to 300 pounds. As the season progressed, we realized that it would most likely end up exceeding that. A~ has contended almost all along that we'd make it to 500 pounds, and right now it seems she may be right. After tonight's 42+ pound harvest we cracked a new ceiling by making it to 313 pounds! So now that it's in sight, we are definitely going to "grow for 500". It's not tons, not thousands, and not enough to sell or anything but we both really are blown away with what we've been able to bring in. In addition to the fact that we will now have some concrete data to gauge future harvests against, having real numbers to quantify our efforts to others has really been an unexpected benefit of the "Big Weigh-in". In my outreach efforts to get people around me excited about the idea of growing food at home, it really helps to have real numbers to present to them. It puts things in better perspective that just the old, "we got a ton of beans" or "we're knee deep in tomatoes". To be able to say that we have harvested over 300 lbs is a thing that everyone understands. If you haven't tracked what you've grown this year I adamantly suggest you look into it for next.

Well, I guess that about does it for tonight. I hope everyone's doing great and with that...I'll catch you tomorrow!
P~

September 11, 2008

I promised

Ok, I promised a Harvest keepers post tonight, but it's gonna be a quick one. We were able to make some last minute plans tonight to go and hear T. Boone Pickens of "The Pickens Plan" speak to Utahns about the ideas that he has for resolving our nations energy crisis and moving us toward energy Independence. It was very interesting and I'll be posting on it as soon as I can, but right now I am t i r e d!!
And speaking of "can"...on to the harvest keeping post.
This year we've been trying to make sure that we put up any extras that we have from not only our garden harvests, but from our gleaning efforts and from the farmers market. We're pretty happy with the nice array that we're building in the pantry. (BTW, that's not everything. There's about twenty - thirty more can's of stuff down in the basement cold storage.) What you can't see to the left of the picture is pickles and some beets. All told I believe we counted 63 total jars of canned goods. Some are qts, some are pints, but all have been tallied on our new handy dandy record tracking system...Umm yeah, that's a regular school notebook but it works! As we have read and learned from a lot of books and many of the great blogs out there, we decided that we needed to keep track of what we have, or we may miss something later.
We are going to be beginning a similar tracking system for the dry goods in our basement as well as the stuff in our outside chest freezer.

I also had a question the other night about "what are dilly beans" and my mouth hit the floor as I thought "hmm, there only like, the greatest way to put up beans!". But here you go, you know who you are, here are what dilly beans are.

"How do you make them?" That was the question from Meadowlark the other day. Here is the recipe:
cook beans for 10 minutes. (approximately two pounds)
Into approx. 5 sterilized pint jars, place 1/4 tsp red pepper flakes. 2/3 garlic cloves, and 1/2 tsp dried dill.
Separately boil 3 cups vinegar and 3 cups water with 4 tsp salt.
After boiling beans, pack them into jars and cover with the boiling liquid.
At this point you will need to put on the rings and lids and boil the bean jars.
I'm sorry but I don't have the times available for water bath canning but if you Google it, you will find the answer I'm sure.

And finally, I leave you with this thought.
"Happy vegetables come from Happy farmers" ...Be happy!
P~

September 7, 2008

Another long weekend

Got quite a bit done. Compost bin has been stocked and is cooking nicely. (I'll show you soon.) Also, the whole composting area has been cleaned and straightened so is much more presentable. I harvested another ten pounds or so from the garden, mostly cucumbers and beans, and A~ put up six more jars of beans and we'll (read: she'll) be putting up more pickles tomorrow. I also managed to get a good bit more work done toward out lawn liberation project for next years expansion.
Of course the weekend wasn't all work, family time is a must and we spent a while at our community center pool on Saturday and watching a little football today. All in all, a good weekend. I'll post more details this week, but for right now...I'm tired.
G'nite!
P~

September 2, 2008

And yet ANOTHER campfire use

So, are you tired of hearing about my campfire uses yet? I hope not. I have to say I've been really really pleased so far with the benefits that we've been able to get from it. We're using waste wood (If your food will be directly exposed to the wood smoke or flame, make sure that it is 'clean' wood not plywood, OSB or particle board. Those woods contain glues and chemicals and can be hazardous to your health. This does not apply to heating water for water bath canning. The jars are sealed and will be under water...no risk.) which in itself saves a lot of power usage but it also helps us to keep out home cooler during a normally very hot process. This reduces our energy use further by reducing our AC usage. Not only that, but best yet, in the words of MeadowLark ( a regular reader) "it involves FIRE - what could be un-fun about that?"
So, what's on today's menu? Chilies!! A few posts back I talked about all the produce that we were able to get from our U-pick-it farm. Part of that was nearly a full bushel of chilies. Aided by the miracle of modern refrigeration these fresh as could be chilies were put on hold until this weekend when we decided to fire roast them before canning them for the winter.
There's really not another way to make chilies taste better in my opinion. If you've never roasted them, any variety at all, you're truly missing out. And it's so easy. Make fire, put chilies over fire, when they're black or nearly so remove them and plunge in ice water (actually even just very cool water will work). After they've cooled for a few minutes, just work them under the water until the skins slip off. Ta Da... roasted chilies.Most of the chilies that we roasted were "Big Jim's", a very large, meaty and mild green chili like the kind you would find in the small cans at the local store. However, we also had some yellow wax peppers, some Ancho chilies, and some Jalapenos. Anyone ever heard of Chipolte peppers? You know, the trendy little spice that comes in everything from Doritos to high end Mexican food? Any idea what it is? Fire roasted Jalapenos, that's it and you can do it yourself.
Give it a try, you'll love it.
P~

August 4, 2008

2008 Garden update - Aug 4th

The update for today is...drum roll please... onions.
This was the first year I have ever planted onions and overall I am happy with the results and will definitely grow them again. I learned a few things along the way too. For instance, onions like to have very soft soil. I grew two different varieties a red and a yellow (sorry I can't remember the exact varieties.) and spread them out throughout different parts of the garden as a natural deterrent to some pest insects. This allowed me to see how they performed in different areas and I can say for sure that the onions in my raised beds overall performed much better.
I also think that the raised beds, because they are a higher quality soil, hold more water and release it more consistently allowing the onions to grow better.
The other thing that I learned is that you need to be patient when the onions start to look like they are done. I ruined about 6 or so of them by pulling them too early. Since I haven't ever grown them, I didn't know exactly what to look for as a sign of being mature so of course like everything else I experimented. Again, be patient. When the majority of the tops have fallen over, looking like some animal crept through your prized onion bed and knocked them all over, then wait a couple more days just to be sure. Then, what I did, was to gently pull the onion loose from the ground, but not all the way out. I left them to sit on the soil in the same way that I see the onions at the local farms sit. I left them to lay there during what were 95-103 deg days for about a week. After that I pulled them and laid them in my over size (3' x 2') garden sieve.
And here we were today after another few days. The onions had dried well and the papers on the outside were crackly and dry but the stalks were still semi pliable. I figured this to be the best time for me to try my hand at an onion braid. It's not as easy as you'd think it is.
So, whatya think? Not too bad for a first timer huh? There's actually two braids of the red onion but the second one was too short to put a good loop on the end so I laid in it front with the extras that I couldn't braid. So I bet your thinking how much? What's the poundage man...don't leave us hanging!! I'm proud to say we hit exactly 25 pounds between the two varieties. Oh yeah, and guess what that means? We're over 100 lbs for this year!!! Better yet, with the other things that we've taken in the last few days we're now over 125 lbs. This weekend should knock me up a few more pounds too with harvesting...oops, look at the time, my it's getting late, I'll have to get back with you on that one *grin*.
Hope all your gardens are growing well.
Grow on!!
P~