Welcome

Welcome All! I'm a dreamer, I hope you are too! A Posse ad Esse, or From possibility to reality, is a general state of mind. I hope you'll share your possibilities with me as I will with you. Namaste~
Showing posts with label 2008 Garden. Show all posts

December 11, 2008

Seed savers 2008

Ever kept your own seeds? I haven't. Until this year that is. I'm not keeping a lot of them, certainly not from everything that I grew, but this will definitely be the first year that I have made a conscious effort to have kept some of them.

There's some concern out there that this may be the year that we start to see some shortages in seeds at least on a consumer level. Sharon Astyk wrote a good piece on it this morning that is well worth the read. Shortage possibilities have not been my catalyst in wanting to start seed saving as much as it has just been an added benefit, but I do remember this years nurseries and the shortages of starts that I was so shocked to see and honestly I wouldn't be surprised to see some shortages affecting select areas.

One of the more interesting seeds that I am saving this year are my tomatoes. The seeds aren't necessarily so interesting as is the way you get them out of that gelatinous muck that they come in. What I did, was to process some of the end of season tomatoes and just squeezed that seed gel out into a separate container. I did this for each species of seed that I wanted to keep, pictured are the brandywine, hamson and cherry and made sure to label them immediately, it's amazing how much the seeds look alike out of the tomato.

After you get them out of the tomato and into their separate containers, you just cover with some plastic wrap, poke a hole in the top and let them sit for a week. It will get a little funky, possibly even moldy, but that's OK.
What's happening now is that they are fermenting. Just like making pickles softens cucumbers, so to does fermenting the tomato seeds. It breaks down the gel around them, and it can them be removed easily. I put mine into a strainer and ran cool water over them while stirring with my finger. The gel easily washed away leaving me some clean seed.
I didn't get a picture of it, but what I did next was to place the seeds between two paper towels, spread them out, and press down to get as much water as possible away. I then scraped them onto another couple of paper towels and pressed again. I left this together to dry for a couple of days and then scraped off into small containers and am storing them in my refrigerator. It's important to get as much water off of the seeds as soon as you wash them so that they don't decide to germinate while they dry. You probably also want to dry them in a cool place rather than a warm one.

In addition to the tomatoes seen here, I am also saving seed from San Marzano's, radishes, parsley, cilantro (coriander) and carrots that I can think of. It's not big stuff, but it's a start. As with all things like this, you can't just jump right in and be an expert. It takes steps and experience and that's what I'm working toward. What kind of seeds are you saving? Any secrets to share.
All the best...
P~

October 27, 2008

Beating Bindweed

My arch nemesis... the absolute scourge of the garden in my opinion is bindweed. If you don't have it in your yard, count your blessings. Personally, I know no gardeners in Utah that have not at some point fought this beast! Here's a picture of a section of my garden beds that have lain empty for about a month and a half. You can see the bindweed right there in the middle of the picture.The other "weeds", dandelions or mallow, are nothing, I don't even stress them at this time of the year. Just a quick pull to keep them under control and forget about it.

We've been really making an effort over the last few years to move toward a more organic method of growing on our property. This season so far we've not used any herbicide or pesticide on our food-garden at all. (full disclosure: I did use a broad leaf weed killer once on the front yard lawn around midsummer.) What this means is that where we don't have the advantage of being able to simply spray and let the wonder of petro-chemicals kill the weeds, we need to instead supplement that with other "inputs". In other words, it takes time and effort.

Through trial and error, I've found the best way to get some control over bindweed is to take a little time to dig the ground up and remove as many of the roots as I can by hand. Last spring I did this to part of the garden, as well as the spring before. This year, with the addition of the new beds, I decided to go ahead and dig the big area that was behind the birdbath. It was really getting infested and needed a dig. You can see here a little of what I'm dealing with. Those roots go down from the top of the ground to easily 12-15 inches. I have been taking a shovel full at a time and turning it over into another pile, and hand sifting through it to remove the root remnants. It's a pain, but really it's the only way I know to safely remove this pest without dowsing the garden in chem's. This year I'm also taking an additional step. As I finish the beds, I'm going to layer the bottoms with some fairly heavy cardboard in hopes that as it takes a year or more to break down it will deter the very deep bindweed roots from coming up.

And there you go. My very hands on, totally organic method of waging war on my arch nemesis. Will it keep it at bay forever???? Doubt it. Will it give me a good season or two of relative peace? Yeah, probably, and every year I do it I will find less and less of it to pull. Then, one day, I'll finally have it totally eradicated, just in time to find a nice piece of land and move somewhere where I'll get to start all over!!

You gotta love being a farmer!
P~

October 25, 2008

"Big weigh-in" Spring/Summer wrap-up

Do you see that? Maybe you can't quite make it out...I'll help you out, It says Spring / Summer garden 511.68 lbs!!! WE DID IT! A~ and I set out this year to grow for 500 lbs and as of yesterday, we not only met, but exceeded that goal. With the days being pretty warm here, and the nights getting around freezing, even the plastic tarping wasn't helping the tomatoes to ripen as well as I'd hoped. (Although the cherry tomatoes are actually still producing.) That said, I decided that it was probably a good time to get out and harvest what was effectively the final harvest from the Spring and Summer garden.
A few of the tom's are still green and some not quite ripe, but all will be enjoyed in their own time. I honestly wasn't sure that we were actually going to be able to make the goal, this being the first year that we had ever aspired to even weigh all of our harvests. A~ on the other hand has seemingly turned into a pro harvest estimator; she said all along that we'd make it and what do you know, here we are.

The best part is, we're not even done completely yet. There's probably another couple of pounds on the cherry tomato, and I have fall planted spinach, beets and kohlrabi yet to harvest. Hopefully the weather will hold for a little longer to let them all bulk up a bit, but if not I have to say A~ and I are both pretty happy that we've been able to meet our goal.

So, what's next? A~'s already talking not doubling but tripling it next year. Um, does she realize that that's 1500 lbs??? Who am I to argue... I'm just the labor. I will say that the backyard expansion is already nearly done and should be by the end of the weekend. The next thing on the list is relocating the chickens for next year and then tilling up our "parking area" on the front side-yard of the house. You didn't think we'd just sit back and be satisfied did you?

Have a great weekend all.
P~

October 20, 2008

Weekend update

Finally, we had a weekend where I could get some stuff done around the house. It's been either raining or snowing the last two so not a lot of work has gotten done. I was able to get the "fallerizing" (Note: Similar to Winterizing, just the first installment.) done on the chicken coop.
What I did was to turn the coop perpendicular to the direction that it was facing. Now the side with the nesting box, which you can see sticking out in this picture, is pointing directly south. This will will allow the winter sun to shine directly on it, as well as allowing the entire roof to get sun throughout the day. It also helps me work with the natural weather patterns in my area where most of our cold winds and storms come from the south. The black pots stacked in front of the open area are filled with soil so they will heat up during the day and radiate that heat back out throughout the night. The last things I did, were to add the side rails to the open sides. This will allow me to give the birds a much deeper amount of bedding in the coop, and will cut down on the direct winds hitting the birds. I also slid the removable bottom of the hen house back in to keep it warmer inside during the winter. I will have to slide it out and clean it once a week or so over the winter, but it will keep the girls dry and warm so it's worth it.

I also was able to get a good start on the final part of our garden expansion for next year where we're "liberating" about 400 sq feet more of our backyard lawn. To begin with I had weed whacked the grass down very short a little over a month ago. I covered this with black plastic to try and kill off most of the grass, and lined up the rough fit of the concrete "urbanite" that I'll be using to construct the beds hardscaping.
Next step in the process called for me to break up the soil. I used a pitch fork for this and was able to pull up a chunk at a time and flip it over completely putting what was left of the grass roots upside down and buried. I did a little poking around to break up the big chunks of dirt, but very little. This I covered with thick cardboard that I scavenged from work, and made sure it went up the fence and under the stones.
I only got about a third of the bed finished today, but hope to have it done and filled by this weekend. I've been collecting a menagerie of compostables to fill it with too. I have coop litter with the obvious "amendments" that that comes with, also grass clippings, finished compost, leaves and straw. I'll finish it off with some finished compost in the spring when I see how much more it needs.
All in all, a very good, productive weekend. I'll keep you posted on the progress. Hope you all had a great one too!

P~

October 12, 2008

Well what do you know?

The weather forecast was right on the money?! We woke up this morning and guess what we found...SNOW. At first I looked out the window and told A~ it was only an inch or two max. Oops, good thing I'm not in the weather business. I took this picture at around 9 o'clock this morning when I went out to check on the chickens (They did great with the snow by the way.)
That's 5 1/4 inches. It kept up all day and on the news tonight, they said we ended up with 8 inches! More crazy weather. It's almost like...like the global weather patterns are all jacked up, changing even. Go figure? I took a little video this morning too, just to break up the monotony.

You'll have to forgive the audio on part of the video, it's a little faint. I just thought some of you would appreciate a look inside the A-frames to see how they're working. Which has been great I think. I took the video this morning at around 9 o'clock as well, and although the temperature
inside was only a little bit over 36 deg F it wasn't freezing, even though the sides of the A-frames were piled with all the snow that had slid off the sides all night.

In the afternoon I went out and checked temps again and, even with the snow that kept coming down all day, the temperature had come up to 59.6 F. The tomato plants were wilting a bit, but the tomatoes were slowly ripening. So far, so good, I guess I'll call the frames a success thus far. Anyone else having any experiences they'd care to share with keeping their harvest going? I'm always looking for new ideas.

Hope the fall is going well for all of you, or for my Southern hemisphere readers your spring. Till next time.

P~

October 11, 2008

Fighting the freeze

First off, I'm sorry to billbillbillbill (Freedom Gardens member) for lagging on getting this post up. Life... it happens, you know?

Anyway, on we go. Those of us local to Utah have found, as have many of our fellow gardeners in the Northern Hemisphere, fall is upon us. And with that the first frost/freeze warnings of the year. We received our first one this week and from the looks of it, it should be a hard one. The forecast is even calling for the possibility of snow in the valley. Drastic steps must be taken!

As you can see, the majority of my garden was removed this week. It's always a hard part of the year for me, sort of a gardeners version of separation anxiety. The beans were done though, as were the cucumbers, but the carrots that were growing in the area under the cukes have been left to overwinter. The only things being kept in the summer garden to try and stretch the harvest of are the tomatoes.

The last few nights have really pushed the limits of what the tomato plants can handle. The night before last in particular. I thought that for any of you that may be new to vegetable gardening I would show you what the signs of too much cold are on your tomato plants.
See there on the left hand corner of that tomato, the almost translucent part of the fruit? That is frost bite. That part of the fruit has been damaged. It's not necessarily beyond hope, depending on the amount of frost bite that happened. Then in the picture on the right, you see the darkened and wilted tips of one of the new shoots coming up on the plant, it's been frost bitten as well. This won't kill the plant, but honestly that shoot will most likely die at this point. It's OK though, I'm gonna tell you what to do with it here in a minute anyway.
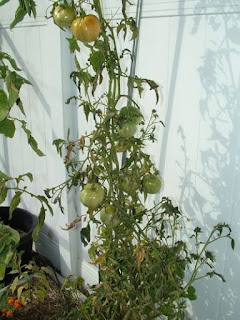
Here are a couple of the tomato plants that I have growing in my beds. The one on the top is my brandywine. It had a very slow summer, I learned that it was not very tolerant of our hot summers here, and now that I've finally set a good number of fruit on it by golly I'm not just giving up on it! The one on the bottom is my San Marzano. I'm keeping it going just for the sheer number of green tomatoes on it.

What I did to these to get them ready for my version of season extension, and which will resolve the frost bitten plant tip from the previous picture, is to prune them. I trimmed the heck out of all of these prior to covering them. This site illustrates tomato pruning very thoroughly so I'll just link to it and not reinvent the wheel. Essentially, the idea is to top the plants, and remove all new growth so as to allow the plant, which is already getting stressed from the cold, to focus on maturing the already set fruit and not to growing more foliage or new fruits.

After I pruned them, and cleaned up the ground around them, I covered them with a 4 mil. clear plastic cover, basically making a small A-frame greenhouse. Let me digress here for a second... I also placed a little garden addition in the beds a few days back that really helps moderate the micro-climates around the plants as well... black water bottles. All they are, are plastic 1 gallon water bottles that I filled with some tap water after painting them black. They will get warm throughout the day and then hold that heat and radiate it back out throughout the cold nights.

I place them right at the bottom of the plants in the path of the sun, and they will slowly radiate that heat back up all night. I took the thermometer picture yesterday afternoon at approx. 3:30 PM when the outside temps were around 50-51 deg F. The temp in the water container is almost 80 deg F. So...back to the A-frame.

Voila! There it is. I want to take a minute to make the statement that this is yet another great benefit of trellising in the home garden, I can't speak to their benefit enough. The trellis that I used this year to hold up the tomatoes is the top of this cover. It allows me to leave the cover over the plants and to be able to get inside to water or check the fruits without removing the whole cover. A very nice benefit.

Fall is beautiful, and it's an important time for both the garden and the gardener to slow down a little, catch their breath and get ready for the next year. If you're really motivated it is possible to harvest all year, although I'm not quite to that point myself yet, perhaps next year. There are a lot of really good ways available and I'm sure some products one could buy to do much the same, but either way if you're not quite ready to give up the battle against the freeze then put together a plan, give it your best shot and as always learn from the process.
Good luck all.
Stay tuned for some interesting and very cool news to come on the next post.
P~

October 10, 2008

Watching the Sunset

Figuratively that is. We're expecting a major cold front to come through this weekend. Possibly even snow in the valleys. There won't be much even if it does come to that, but either way it'll be cold! So, like how the day winds down slowly and gradually the sun sets on the day so too has the garden, the summer garden that is, begun to slip into the horizon. It's not gone yet but it's fading for sure. I still have a bunch of tomatoes on the vines that I want to see how long I can keep in production, and there's a few chilies that are still not quite ripe, but those are all planted together so I'll be doing my best tomorrow to build them a sort of greenhouse/hoop house.

As for the fall garden, it's doing pretty well. The beets and spinach are plugging alone well, but I was hoping the kohlrabi would be doing a little better. Worst case, I guess I can always just eat the greens since they're edible too.

Not too much more to say than that. I hope to have a better post for you tomorrow.
Till then.
P~

October 6, 2008

I've got Leather Britches!

Yeah, and their green and kinda slowly getting wrinkly and...oh wait, you didn't think I meant like actual "leather britches" did you? No no no no no... that's just not something that anyone would want to see!

What I'm talking about is green bean leather britches. Strings of green snap beans that are dried to preserve them for later use. It's one of the oldest ways of preserving food, and one I'm excited to see how it works out. Here's what they look like in my cold storage downstairs.
When A~ was out in West Virginia she spent some time talking with her mom about the kind of things we are doing out here; growing, harvesting and preserving food for instance. As they talked, T~ (that's her mom...) reminded her of stringing leather britches when she was little. A~ said it was like a little door to her past opened up and she could totally remember it and couldn't believe she had never remembered it on her own. I was intrigued, having never heard of it, so of course with the glut of beans we've had this year I had to at least give it a try.

Here's a detail of how the beans have been strung up to dry. I started one with a darning needle and a strong but thin string (I used crochet string.) through a thick bean, tied the string around it and then proceeded to string the beans through the center onto the string.
It's a lot like stringing cranberries or popcorn for garland. After stringing about three feet of beans, I doubled the strings over and tied them together. These I hung over the old curtain rod downstairs to dry.

After I did a little research, I found out that this kind of preservation of beans is a very common and very traditional method of preserving the harvest in Appalachia. If you have a few minutes, this is a very interesting read about some of the ways leather britches are cooked and some of the history of the Appalachian cooking and methods. These are the kind of gems of knowledge that are out there in the world around us, but are hidden in plain sight for the most part. But, if we take the time to ask questions and share about the things that we're working on, and then actually listen to their answers, I think we'd be surprised how much useful and traditional information is out there for us.

I'm so thankful for the great Appalachian heritage that A~ brings to our home. We'll certainly think of it fondly while we're warmed by a hot bowl of vegetable soup with leather britches on a cold night this winter. Just one more way to preserve, extend and make the most of the harvest.

Till tomorrow.
P~

100 Ft Diet and Harvest Keepers - Sauerkraut

At the beginning of September I wrote that I had decided to try my hand at making some homemade, very simple recipe, traditional Sauerkraut. That's it below, when I had just put it into the jar and crock. I only made a batch that called for 5 lbs of shredded cabbage and used some cabbage from our garden. Cabbage that was specifically planted with this idea in mind. Now I've never really been a huge sauerkraut eater; it's not something that we ate a lot of as I grew up, but I decided a few years back that it was something I wanted to "try again" and you know, I liked it. It wasn't something that I would get cravings for or anything but it was alright. So why make a concerted effort to grow cabbage, and make the stuff from scratch right? The answer is pretty simple actually. Because this is one of those foods that is easy to make, is very healthy, can be used as a condiment or as a main course dish and most importantly is a food that can be stored for long periods with simple methods making it a very good staple food to know how to make.
And now, a month and a week later, I have this. I jar with some slowly lacto-fermented cabbage, that when smelled is absolutely amazing! I now get why this stuff got to be so darned popular in the first place. The brine that developed around the cabbage is a slightly salty, almost kosher pickle tasting flavor and the cabbage itself still retains a lot of it's original texture, while being soft enough for us to know it's done. Here's a closeup.
I was worried about the liquid getting funky or moldy while it sat in the cold storage, but brine filled plastic bag that sealed the top off worked perfectly. That is absolutely the way to go by the way.

After we took the kraut out of the jar and started warming it over the stove, the smell of it was making our mouths water. Add a beer boiled brat, some steamed dill potatoes and popovers and you've got yourself a German dinner extraordinaire!
The best part of it all was that we only used a little more that 1/4 of what I made, and better yet, I harvested a 6 lb cabbage tonight that's going to make more of this tasty stuff for the winter.

If you've never tried it, and even if your not traditionally a Kraut lover, I encourage you to give this very simple recipe a try. I have to verify it, but I believe it was just 3 tbsp of salt (pickling preferably) to each five lbs of cabbage. I used the Salt Lake salt that I made a couple of months back. It worked great and helped to make this a totally local food product! You add the salt to the cabbage in a large bowl and mix it with your hands well, then pack in a crock or the largest jar you have (food safe buckets are also supposed to work well in place of large crocks.) and cover the top with either a weighted plate, or better yet, a large brine filled bag. Let it sit in a cool (60-70 deg F) room for a few weeks, cleaning the cover off regularly and voila! Sauerkraut. Or better yet, go to your library and rent "The joy of pickling" and check out the many different recipes that they have in it.
Good luck, and go make some Kraut!
P~

October 1, 2008

You're still here??

Or at least that's what the statcounter says.
Glad you hung in there. Everything gets a little out of kilter when A~'s not here, but as I said before, we survived. Tell you the truth, I'm just glad she decided to come back at all. I mean West Virginia is "Almost Heaven" after all.
This is one of her favorite places to visit when she's back there. She's got good taste dontcha think? I wish we could build us a little homestead up there. Oh well... Dreams huh?

Meanwhile, I was thinking that since I haven't posted anything, let alone a good update to the garden progress for the fall, that you might be interested in what's been going on. Oh yeah, and NOT going on this fall.
Beets are doing great! I figure I'll probably let these grow for another week or so, and then thin them for the greens. If you've not tried beet greens sauteed with some butter and garlic you are missing out. This has been the first year that I've grown them, and I've been really happy with them. They germinate well, grow quickly and are useful from their small leafy stage through their mature root form.
The other Rock-Star of spring/fall gardening is doing great too. Spinach! I planted a bunch more for the fall than I did in the spring. The idea being that, since spinach is so cold tolerant, I will be able to get good greens clear through Thanksgiving (that's the goal anyway.) and hopefully put some up for the winter until I can start again in the spring.
And finally, the Kohlrabi. This is the second planting of the year. Planted for a fall harvest. This is also the first year that we've grown this plant, but we all loved it! I don't know how it will do as fall gets on, as it's rated as the least cold tolerant of the brassicas, but hey, it's worth a try right? Besides, I have a few tricks I haven't pulled out yet too.

As for the NOT so goods, there are a few. Broccolli and carrots to name a few. My broccoli just never germinated, and the carrots...I think that some birds got to the sprouts. They were there and healthy one day, gone the next. I do have some back up's on those though. Remember I planted some under the cucumbers? I won't be storing tons of them or anything, but I should get a good ten pounds or so.

We're looking to have a slow weekend coming up. Rain and cold, snow in the mountains. I was hoping to get caught up on some yard work, but we'll see I guess.
Hope your weeks been great.
Til tomorrow.
P~

September 21, 2008

Growing for 500!!

I got out into the garden this evening, and was able to bring in what was actually more food than I realized I had ready. After bringing it all in and seeing how much there was I realized I hadn't put up a good harvest picture for some time so why not now! And if I don't say so myself, didn't I set this shot up nicely? It's approx 42 lbs of food.
In the picture I have apples, green beans, Marketmore and Boston pickling cucumbers, jalapenos, San Marzano tomatoes and some volunteer Romas, ichiban Japanese eggplant, bell peppers and Swiss chard. Oh and let me throw this little tidbit it...that's only half the beans I pulled today. In total I picked 22 1/2 lbs of beans today! Is that crazy or what? Good thing we all love beans right? Guess what I'll be doing next week? Yep, canning. Speaking of that, anyone have a good recipe for applesauce? We actually gave almost 10 pounds of beans away to some friends of ours that are looking into growing their own for next year but we still have plenty. It really is a blessing to be able to share with friends and family when we have a bounty isn't it?

A~ and I talked at the beginning of this season, when we decided to make a concerted effort at weighing all of our food we really had no data to go by in guessing what we'd get out of it. Initially we guess we may be able to make it to 300 pounds. As the season progressed, we realized that it would most likely end up exceeding that. A~ has contended almost all along that we'd make it to 500 pounds, and right now it seems she may be right. After tonight's 42+ pound harvest we cracked a new ceiling by making it to 313 pounds! So now that it's in sight, we are definitely going to "grow for 500". It's not tons, not thousands, and not enough to sell or anything but we both really are blown away with what we've been able to bring in. In addition to the fact that we will now have some concrete data to gauge future harvests against, having real numbers to quantify our efforts to others has really been an unexpected benefit of the "Big Weigh-in". In my outreach efforts to get people around me excited about the idea of growing food at home, it really helps to have real numbers to present to them. It puts things in better perspective that just the old, "we got a ton of beans" or "we're knee deep in tomatoes". To be able to say that we have harvested over 300 lbs is a thing that everyone understands. If you haven't tracked what you've grown this year I adamantly suggest you look into it for next.

Well, I guess that about does it for tonight. I hope everyone's doing great and with that...I'll catch you tomorrow!
P~

September 17, 2008

The "Big weigh-in" Update.

Just an FYI. I finally updated the "Big weigh-in" tonight. total this year we have harvested 262 lbs of veggies and 233 eggs from the chickens.
I think realistically we're shooting for about 350-400 lbs for this year total. Not to bad if I do say so. I'll try to keep it posted more often.
P~

September 11, 2008

I promised

Ok, I promised a Harvest keepers post tonight, but it's gonna be a quick one. We were able to make some last minute plans tonight to go and hear T. Boone Pickens of "The Pickens Plan" speak to Utahns about the ideas that he has for resolving our nations energy crisis and moving us toward energy Independence. It was very interesting and I'll be posting on it as soon as I can, but right now I am t i r e d!!
And speaking of "can"...on to the harvest keeping post.
This year we've been trying to make sure that we put up any extras that we have from not only our garden harvests, but from our gleaning efforts and from the farmers market. We're pretty happy with the nice array that we're building in the pantry. (BTW, that's not everything. There's about twenty - thirty more can's of stuff down in the basement cold storage.) What you can't see to the left of the picture is pickles and some beets. All told I believe we counted 63 total jars of canned goods. Some are qts, some are pints, but all have been tallied on our new handy dandy record tracking system...Umm yeah, that's a regular school notebook but it works! As we have read and learned from a lot of books and many of the great blogs out there, we decided that we needed to keep track of what we have, or we may miss something later.
We are going to be beginning a similar tracking system for the dry goods in our basement as well as the stuff in our outside chest freezer.

I also had a question the other night about "what are dilly beans" and my mouth hit the floor as I thought "hmm, there only like, the greatest way to put up beans!". But here you go, you know who you are, here are what dilly beans are.

"How do you make them?" That was the question from Meadowlark the other day. Here is the recipe:
cook beans for 10 minutes. (approximately two pounds)
Into approx. 5 sterilized pint jars, place 1/4 tsp red pepper flakes. 2/3 garlic cloves, and 1/2 tsp dried dill.
Separately boil 3 cups vinegar and 3 cups water with 4 tsp salt.
After boiling beans, pack them into jars and cover with the boiling liquid.
At this point you will need to put on the rings and lids and boil the bean jars.
I'm sorry but I don't have the times available for water bath canning but if you Google it, you will find the answer I'm sure.

And finally, I leave you with this thought.
"Happy vegetables come from Happy farmers" ...Be happy!
P~

September 10, 2008

The dark ugly underbelly.

It has been brought to my attention that perhaps I have been hanging around the garden with my rose colored lenses on. I have, from time to time, mentioned how the garden has been a bit off this year, and how some things I just was not happy with. But what? I guess I owe it to you to show you the dark seedy underbelly of my garden.

Exhibit A: The gardens poorest performing zucchini plants. These guys had such a hard time even getting started this year, that I had to go out and manually pollinate them daily for the first 3 weeks. Even after the bees showed up, I've never really gotten a lot of fruit from them. Put it like this, I haven't had enough to get sick of zucchini... get the point? And now, they have begun dying early on me. But I have found the culprits...all of them!
Squash bugs. Yep, I have more bugs than just praying manti. When I uncovered these this evening I realized it was worse than I even thought, nearly an infestation. Time to get out the soap! The chickens won't even eat them. What's up with that?
Exhibit B: The cucumber vines. Look at that pathetic pale drying. (no the squash bugs aren't getting them.) They just aren't healthy. I did notice some new growth tonight, but they've just not performed nearly like in years past.
And this is what I've gotten from them for the most part all season. Softballs. The funky shape is from incomplete pollination. Oh, they taste fine, and we've still been able to put up pickles, but not nearly like we had hoped. Any suggestions? Anyone else had this problem?
Exhibit C: Miniature bell peppers. Yep, that babies mature, all 2 and a half inches of her. Peppers are another crop that I really had good hopes for this year but is probably the worst producing of all of them. These are the first peppers from these plants ( I've picked one off another plant.) and I fear it is all my fault. Despite my best planning, I planted them in the same bed that I've had peppers in for the last three years...Crop rotation, crop rotation, crop rotation!!!
Exhibit D: Broccoli. Do you see there in the distance... the vigorous sprouts??? No? Me neither, but I should. Everything else has come up for the fall garden, that's a little kohlrabi sprout in front, but not broccoli. Add to that the fact that the spring broccoli that I planted never headed up at all, and just went leggy and flowered, and It's been a total bust this year.
And last but not least, the pests. Found this little bugger tonight. They've just started getting to my beans. This weekend, I'll hit em with a little diotamaceous earth and water mixture. That'll show em!
So there you go Mike. My little garden of eatin' has been uncovered for the mess it is. Well OK, it's not a mess and we've been really pleased by most of it, but by no means is it perfect and everything is NOT going the way I planned. But guess what, that's what gardening is about. I get better and more productive every year. And every year, I love it more and more.
Be well all...tomorrow is another Harvest Keepers update. (oh yeah, and Dilly bean recipe by request!)
P~

September 9, 2008

Beans are here for sure!

Oh yeah, the beans are on now. I can go out every night and pick a pound or two of beans without fail. Or, like tonight, I can go out after skipping a day and a half and pick a quarter bushel that weighs 4 1/2 pounds. Looks like some canning is in the future huh? And this is after putting up 6 pints of dilly beans this Sunday too!
Check out the progress with the bean trellises so far this year. The idea for the cube shaped trellising was that I would be able to bring the beans out toward me, rather that having one big bush that we have to dig through every day like last year. Below is the picture from the end of June showing the summer gardens just taking off.
And here, below, (don't mind that ugly shmoe digging around in the foliage) is the bean plants this evening. As you can see, the plants are really easy to get to, and in fact, I have a small rolling garden box that I sit on to do most of the picking. Much much better than last year!
And finally, guess who else loves the bean plants? This big ole mantis is who. Actually in the interest of honesty in journalism, I found this guy on the siding of our house but he's been relocated to the beans. We set out a cocoon early this spring for manti, could they get this big in one season? Do they over winter? Anyone?
On a positive note, while the other plants in the summer garden didn't perform to expectations, at least the beans are prolific this year.
Till tomorrow.
P~

September 7, 2008

Another long weekend

Got quite a bit done. Compost bin has been stocked and is cooking nicely. (I'll show you soon.) Also, the whole composting area has been cleaned and straightened so is much more presentable. I harvested another ten pounds or so from the garden, mostly cucumbers and beans, and A~ put up six more jars of beans and we'll (read: she'll) be putting up more pickles tomorrow. I also managed to get a good bit more work done toward out lawn liberation project for next years expansion.
Of course the weekend wasn't all work, family time is a must and we spent a while at our community center pool on Saturday and watching a little football today. All in all, a good weekend. I'll post more details this week, but for right now...I'm tired.
G'nite!
P~

August 13, 2008

2008 Garden update - Aug 13th

Time for another Garden Update.
In the last week and a half or so, the garden has really started to come up to where I thought it should be a couple of weeks ago. Long spring, and sudden hot summer really prolonged the growth spurt, but it seems to be here now.I thought you guys might like to see what it is that the whole raised bed section of the garden looks like in context, rather than just a pic here and one there. If you click the picture you can see the full sized version that I seamed together.

These are the Hamson tomatoes that I decided to try out this year. They're tasty, but the tops have all been split to as least some degree so they don't really make a great slicing tomato. But for salsa... perfect. They're also a semi-determinant variety so I get quite a few at a time as you can see. This picture was taken just after I pulled about five or six ripe toms from the plants.
Another late comer, but a very welcome one to the garden is the green bells. This one is forming just perfectly, and there are another 4-6 of them staggered just behind it, so as usual it'll be feast or famine.
Here's a late cabbage that I honestly didn't think would head up, because of the heat, but the fence that's just behind it and blocks the morning sun, combined with the shade of the apple tree that's west of it, must put it in just the right micro-climate to benefit it. No complaints here.
And speaking of the apple tree, it's piled full on a lot of the branches. One problem, the organic methods I tried to keep the bugs out either didn't work, or more likely I was not diligent enough with them. Either way, the apples will make fine applesauce and/or pies.
Above is Mount Squash. There are four pumpkin plants in there, and two butternut's. I the middle I placed one of the wire trellis systems that I used for my peas earlier in the year. The vines have taken it over and then some.
Here's one of the pumpkins that have set successful. There are a couple of them buried in there.
I planted marigolds to help attract bees and beneficial insects this year. Here is one of the ones that I started from seed. It grew a lot slower to start with and took forever to set a flower, but that sucker is two and a half feet tall. Are they supposed to be that big?
And on to the pickles which finally set. Now I'll be swimming in them soon enough. This is the first year for us actually growing pickling cukes. I pulled the first few pounds of them today and their very very tasty, can't wait to pickle some.


So, there you go, a bit of eye candy and a little catch up with what's been going on in the Freedom Garden. Tomorrow I'll get up some pictures of the girls, they've been laying consistently, and as a matter of fact, the younger ones that I got as a second batch are just starting to. Fun stuff.
See you tomorrow.
P~